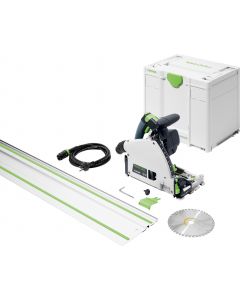
How to use...
In action
Versions
Plunge-Cut Saws: How to cut
It’s no secret that Festool plunge cut saws, also known as track saws, are the preferred cutting tool for DIY enthusiasts, professional carpenters, and tradespeople. They create precise, clean cuts in various materials, ensuring a rewarding power tool experience. As with many tools, it’s best to learn a bit more about how to use them before diving straight in, for the sake of safety and efficiency.
GATHER YOUR TOOLS AND SET UP YOUR WORKSPACE
Preparing your workspace before you make the first cut helps establish an efficient workflow, avoid mistakes, and, very importantly, maintain safety standards.
You will need:
- A plunge cut saw
- Protective safety gear such as safety glasses, ear protection, and a dust mask
- A clear workspace such as a sawhorse or workbench
- Guide rails
- Measuring tools
- Pencil
- Clamps
- Battery pack or power cable
- Plunge cut saw blades


Plan for precision:
You can minimise mistakes and eliminate wastage with careful planning. Begin by measuring your workpiece and inspecting it for defects. Measure each cut and mark the cutlines with a pencil. While measuring your workpiece, remember to account for the kerf or width of the blade, as this will affect the final dimensions of your workpiece and your guide rail placement. The kerf will vary between blades, so make sure to check these measurements
Select the appropriate blade for your material and install it by raising the lever and plunge action to lock it in place before you access the bolt and lock spindle. Remove the splinter guard or clear-view window and use the supplied hex key to undo and remove the bolt and counter flange. Free and remove the existing blade and replace it with the appropriate one. Reapply the counter flange and bolt and release the fast-fix lever.
For optimal results, when fitting a new saw blade you should also fit a new splinter guard to the saw. As splinter guards are cut precisely for each individual blade there may be a gap if you change to a different width blade increasing the risk of splintering.
Align the guide rail with the cut mark, and using clamps, secure your workpiece to the work-surface to prevent movement or vibration while cutting. You can attach guide stops to the track for exact cut lengths and repetitive cutting.
SEE ALSO:
- How to use Circular Saws - a comprehensive Guide
- How to put a blade on a circular saw
- How to Cut Straight Using a Circular Saw
- Plunge Cut Saws and Blade Size
- How to build a workstation for a table saw
- How to use a Table Saw


Take the plunge to make your cut
Now that you’re all set up, it’s time to start cutting. Always practise with a scrap piece of the material you are working with. This will allow you to familiarise yourself with the saw to assess its speed and power.
Next, set the blade's cutting depth according to the desired depth of the cut or the thickness of the material. Do this by setting the depth to zero on the depth setting indicator. Plunge the saw to assess the blade depth in relation to the material and adjust it accordingly on the depth adjustment setting.
If the plunge cut saw has a scoring function, engage it to produce a shallow pre-cut ahead of the final cut in a single motion, ensuring a splinter-free finish.
Align your plunge cut saw with the guide rail and position the blade above the surface of the workpiece. Tighten the greet cams to the track to eliminate sideways movement and ensure the saw moves freely along the guide rail; if it doesn’t, loosen the cams slightly. Next, calibrate the splinter strip on the rail, lining it up with the cut measurement marks to produce an exact cut.
Turn the saw on and allow it to reach full speed before lowering the spinning blade onto the material. Move the saw slowly and steadily forward along the guide rail to prevent kickback and maintain control.
As you complete the cut, maintain a slow and steady pace and avoid sudden movements to achieve a clean finish and prevent splintering. Once the cut is complete, wait until the blade has come to a complete stop, release the plunge mechanism, and lift the blade clear of the workpiece.
With a bit of patience and by following these steps, you’ll soon learn how to cut using your plunge cut saw. Always work slowly and deliberately, following safety protocols, and you will quickly discover the joys of this high-powered precision cutting tool. Don’t hesitate to ask the professionals if you need help with your plunge saw.


