How to use...
In action
Versions
Plunge-Cut Saws: A How-to-Use Guide
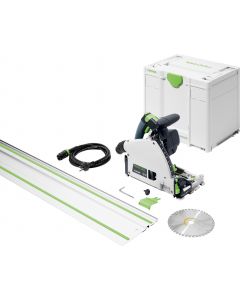
A plunge-cut saw, sometimes called a track saw or plunge saw, offers impeccable accuracy and efficiency in cutting sheet materials and making rip cuts. This versatile tool is designed to help carpenters and tradespeople make straight and precise cuts in materials such as wood, cement sheet products, plastic, and metal. Power tools like plunge-cut saws are a brilliant way to elevate your craft; you just need to know how to use one
How To Use a Plunge-Cut Saw
Before you switch on your plunge-cut saw, there are a few things to bear in mind to ensure a successful project.
Step 1: Prioritise Safety
Plunge-cut saws are powerful tools that need to be used with safety in mind. Wear personal protective equipment, such as safety glasses, ear protection, and a dust mask, to work safely and comfortably.
Next, ensure the saw is in good working condition, carefully inspect the sharpness and condition of the blade. If your saw is not cordless, make sure the power cord is undamaged.
Another critical aspect of safety is selecting the correct blade for both your project and plunge saw to avoid injuries, poor-quality cuts, and damage to your saw and blade.


Choose your saw blade based on:
· The material you are working with
· Blade thickness
· Blade diameter
· Hole diameter
· Cutting Width
· Number of Teeth
· Chip Angle
· Tooth Shape


Step 2: Set Up Your Workspace
The best workspace is clutter-free and large enough to support your material securely. You can use sawhorses or workbenches, which are appropriately sized for your materials.
Step 3: Set the Cutting Depth
For optimal performance, it's critical to adjust the cutting depth of the plunge saw according to the material. It must be able to cut through the material without exposing too much of the blade. This will prolong the life of the blade and ensure a clean cut.
Step 4: Align the Guide Rail
To create straight cuts, you need perfect control over the cutting direction.
This is achieved using guide rails or tracks to cut the line on your workpiece. While some plunge saws have a built-in mechanism to attach the guide rail, others require clamps.
If your plunge saw requires clamps to attach the saw to the guide rail, make sure they are tight and stable before you begin.


Step 5: Position the Blade and Turn On the Saw
Once the workpiece is secured and the guide rails are in place, position the blade slightly away from the edge of the workpiece and above the surface. Before you switch the saw on, take a moment to familiarise yourself with the plunge mechanism
Step 6: Plunge the Saw and Make the Cut
Make sure the blade of the saw has reached full speed before you begin to cut. Slowly and steadily lower the blade onto the workpiece to prevent kickback.
Work in a fluid and controlled manner; pushing the saw along the guide rail and following the cut line to achieve a smooth and accurate cut. It’s always a good idea to create test cuts on scrap material before working on your workpiece.
Step 7: Complete the Cut and Release the Plunge
Be mindful to maintain a steady motion as you complete the cut to avoid potential tear-out or splintering. Support the off-cut with a firm grip to prevent it from breaking away prematurely.
Once the cut is completed, gently disengage the plunge mechanism, lift the blade from the material, and switch off the saw. Ensure the saw comes to a complete stop before putting it down.
With some practice and patience, you’ll be able to achieve precision cuts efficiently with a plunge saw. Elevate your craft with a new, cutting-edge plunge saw today.


